
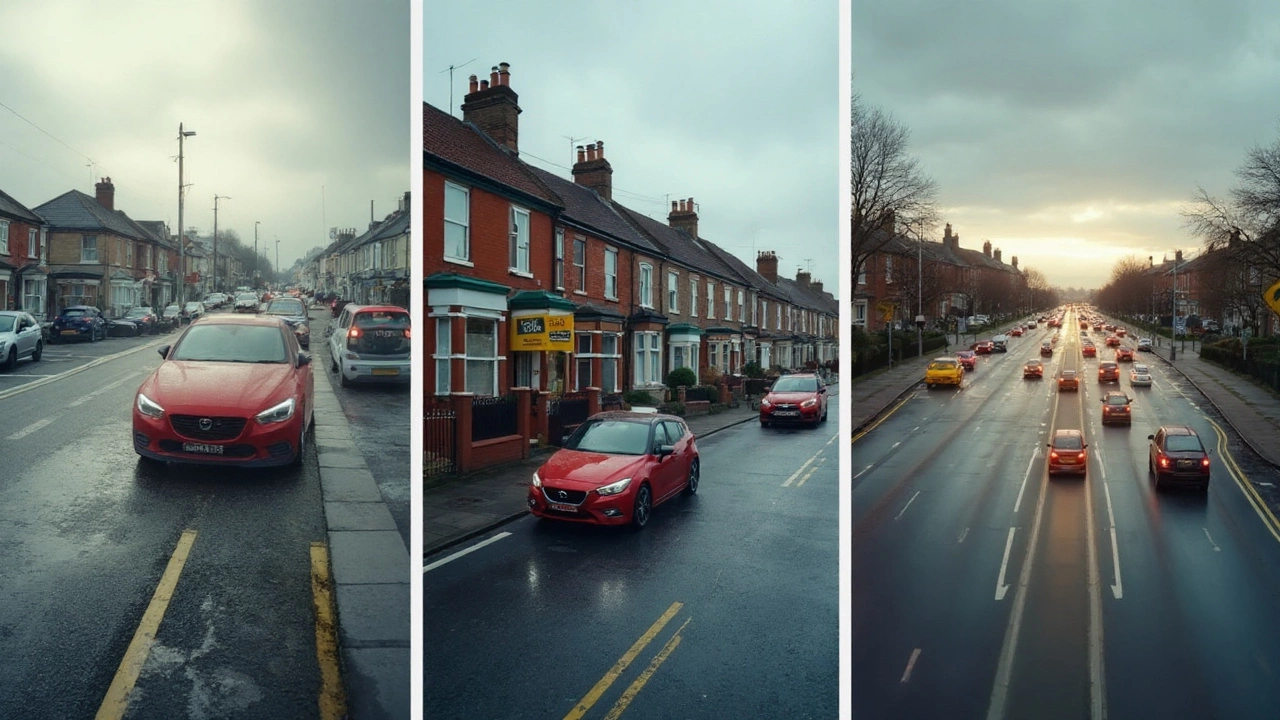
You want to go from “no idea” to confident behind the wheel-without leaning on endless paid lessons. You can do a huge chunk of the learning yourself. There’s one catch: in the UK, you can’t drive solo until you pass the practical test. So the goal here is simple-self-direct the bulk of your learning, stay legal and safe, and use an instructor only where they add the most value.
Yes, you can teach yourself to drive-but do it the smart way: nail the legal setup, build a tight practice plan, and stick to proven routines. I’ll show you exactly how.
TL;DR / Key takeaways
- Legal first: UK learners need a provisional licence, L plates, a sober supervisor (21+ with 3+ years’ full licence), and insurance. You cannot drive alone on a provisional.
- Start off-road or in an empty car park, then quiet streets, then busier roads and dual carriageways. Layer difficulty slowly.
- Use simple routines: POM (Prepare-Observe-Move), MSM/MSPSL (Mirrors-Signal-Position-Speed-Look), 2‑second gap in dry, 4+ in rain (Highway Code).
- Mix in night, rain, hills, and rural routes. Practise parking early. Do hazard perception training daily.
- Before test day: do a mock with an ADI, cover “show me, tell me” questions, and practise following sat nav. You still can’t use motorways as a learner unless with an approved instructor in a dual‑control car.
Step-by-step: From zero to test-ready (the self-taught path)
-
Sort the legal basics (UK, 2025)
- Get your provisional driving licence.
- Eyesight: be able to read a number plate at 20 metres (DVSA standard). If not, fix your vision first.
- Insurance: learner driver insurance for the car you’ll use.
- L plates (or D plates in Wales) front and rear. Remove after you pass.
- Supervisor: 21+ and held a full licence for 3+ years. They must be sober, alert, and not on their phone.
- Phones: using a handheld phone while driving is illegal. Don’t touch it.
- Motorways: learners may only use them with an approved driving instructor (ADI) in a dual‑control car.
-
Pick your gearbox and car
- Manual: more flexible licence, slightly steeper learning curve (clutch, bite point, gears).
- Automatic: simpler to manage in traffic; your licence will be automatic‑only.
- Choose a calm, predictable car with good visibility. Adjust your seat so you can fully press pedals without stretching; slight bend in your elbows at 9‑and‑3 steering.
-
Do the cockpit drill (every time)
- Doors: closed and locked.
- Seat: height and distance set; comfortable reach to pedals.
- Steering: clear of knees; 9‑and‑3 grip.
- Seatbelt: snug, not twisted.
- Mirrors: set interior mirror to frame the rear window; adjust wing mirrors to just show car’s edge.
- Footwear: flat soles, good pedal feel. No thick boots or heels.
-
Learn the controls (static first)
- Pedals: in a manual, left to right is clutch-brake-accelerator. In an automatic, it’s brake-accelerator (use right foot only).
- Gears: manual H‑pattern; automatic PRND. Learn reverse lockouts and safety.
- Handbrake or electronic parking brake; hazard lights; lights; demisters.
- Steering: push‑pull for smooth turns; avoid crossing arms mid‑turn at speed.
-
First moves in an empty space
- Find a wide, empty car park during quiet hours (supermarket late evening or early morning, with permission if needed).
- Manual: find the bite point with clutch; add a touch of gas; handbrake off; creep, stop, repeat. Feel the car’s weight shift.
- Automatic: foot on brake, select D, gentle release with slight gas, smooth stop. Practise smoothness.
- Basic patterns: straight lines, gentle figure‑eights, tight turns, smooth braking. Keep speed walking‑pace to cycling‑pace.
-
Adopt the core routines
- POM: Prepare (gear, bite, set gas) - Observe (mirrors, blind spot) - Move (release brake/handbrake, steer).
- MSM / MSPSL: Mirrors - Signal - Position - Speed - Look. Say it out loud early on.
- 2‑second rule (dry), 4+ seconds (rain), much more in ice. See a marker, count “one‑thousand‑and‑one…”
- “Creep and peep” out of blind junctions: tiny movement, constant scanning.
-
Quiet streets: add real traffic safely
- Plan a simple loop with left turns only at first. Then add right turns when you’re smooth.
- Speed control: stay under limits; look far ahead. Use 2nd gear for slow corners in a manual.
- Meeting traffic: use passing places, give way on narrow roads, keep calm.
- Stopping distances: keep space you can stop in. Don’t tailgate, even at 20 mph.
-
Junctions, roundabouts, and priorities
- Give Way vs Stop: at Stop signs, full stop. At Give Way, you can roll if clear.
- Roundabouts: mirror-signal on approach, choose lane by signs/markings, look right, commit only when you have a safe gap. Signal left on exit you’ll take.
- Right turns across traffic: position early, wheels straight when waiting, enter when both streams allow.
- Pedestrians and cyclists: anticipate; give space. Keep scanning crossings and door zones.
-
Parking early (don’t leave it till the end)
- Bay parking: go slow, use reference points (mirror aligned with line, lock at a known point), straighten early.
- Parallel parking: set up alongside with a door‑mirror reference, slow reverse, small steering inputs, stop to reassess if unsure.
- Always finish with wheels straight, handbrake on, car secure.
-
Theory and hazard perception (start now)
- Read The Highway Code. Add 10-15 minutes daily.
- Practise hazard perception clips; learn to spot developing hazards early and progressively.
- Book theory test as soon as your mock scores are consistently high.
-
Build speed and complexity
- A‑roads and dual carriageways: plan merges; match speed; use mirrors, signal, shoulder check before moving.
- Lane discipline: keep left, overtake, then return.
- Weather: in rain, add big gaps and smooth inputs. In frost, be gentle and avoid sudden braking.
-
Special situations
- Hill starts: set bite, more gas, release handbrake smoothly; don’t rush the clutch.
- Emergency stop: hard brake straight, clutch down as you stop (manual), mirrors after you’ve stopped.
- Night: slow down, dip beams for oncoming traffic, watch for glare.
-
Mock tests and polish
- Do a mock with an ADI: they’ll catch blind spots, lane discipline, and test‑route habits.
- Practise “show me, tell me” vehicle safety questions while driving.
- Sat nav: follow directions calmly for 20 minutes; glance, don’t stare.
-
Book and pass
- Book the practical when your mock passes are consistent and your supervisor would trust you solo.
- Sleep, eat light, and treat test day like a normal drive. Listen, stay safe, and don’t fixate on small slips.
Examples, plans, and real-world practice routes
Here’s a simple plan you can run in 6-8 weeks. Stretch it if needed. More short, frequent sessions beat one long weekly slog.
- Week 1: Car controls, cockpit drill, moving off and stopping in an empty car park. Start theory revision.
- Week 2: Quiet residential loop. Left turns, basic junctions, consistent mirror checks. Add gentle right turns mid‑week.
- Week 3: Roundabouts (mini first), simple hills, bay parking. Night drive taster if safe.
- Week 4: A‑road practice, dual carriageways (not motorways unless with ADI). Parallel parking. Hazard perception drills daily.
- Week 5: Mixed weather practice, rural lanes, emergency stop. Sat nav following.
- Week 6: Mock test with ADI, polish observations, confirm theory pass if not done. Book practical if consistent.
Route ideas: use a quiet industrial estate on Sundays, a retail park car park after hours, and a loop that includes one mini‑roundabout, a zebra crossing, and a small hill. Add complexity slowly: extra lanes, bigger roundabouts, then faster roads.
| Manual | Automatic |
|---|---|
| Pros: Full licence covers both; cheaper cars; better control on hills. | Pros: Easier in traffic; fewer stalls; simpler focus on road craft. |
| Cons: Stalls early on; more to juggle (clutch, gears). | Cons: Licence is auto‑only; can mask sloppy speed control if you’re not careful. |
| Best if you want maximum flexibility later. | Best if coordination anxiety is holding you back right now. |
Heuristics that save you:
- “Tyres and tarmac”: at a stop, leave enough gap to see rear tyres of the car ahead plus a strip of tarmac.
- “Look where you want to go”: your hands follow your eyes, especially in bends and parking.
- “If you can’t stop in the distance you can see, you’re too fast”: golden rule for night and rural lanes.
- “Gear for the speed, not the corner”: slow first, then pick the right gear.
Cheat sheets, checklists, and routines you can print
Pre-drive checklist
- Provisional, insurance, L plates on.
- Doors locked, seat/steering set, seatbelt on.
- Mirrors adjusted, windows clear, no loose clutter.
- Route planned; supervisor briefed to stay calm and give clear directions early.
Moving off safely (POM)
- Prepare: gear set, bite + a touch of gas (manual) / select D (auto).
- Observe: mirrors, right shoulder check.
- Move: signal if helpful, steer out smoothly, cancel signal.
MSPSL at junctions
- Mirrors: centre, then side you’re moving toward.
- Signal: clear and timely.
- Position: left/right within lane; commit early.
- Speed: brake early and gently; select gear for the new speed.
- Look: both ways; check for late hazards; go only on a safe gap.
Parking references (quick cues)
- Bay in forward: when your mirror reaches the third line, steer full lock. Straighten early.
- Bay reverse: stop with your shoulder at the line, turn full lock as the line disappears under the mirror; creep in, straighten.
- Parallel: line up mirrors, reverse until your rear lines with their rear, steer in; pause to check angles; small fixes beat big swings.
Emergency stop (practice with a clear empty space)
- On signal, brake hard in a straight line; clutch down as you stop (manual).
- Handbrake on; select neutral; observe before moving again.
Stall recovery (manual)
- Handbrake on if needed; neutral; restart calmly.
- Bite, mirrors, signal if needed, move off again. Don’t panic.
Hill start (manual)
- Set bite with more gas than usual.
- Release handbrake slowly; hold the car with the clutch; then fully off clutch as you roll.
End-of-session debrief
- What went well? What one thing to improve next time?
- Log areas covered: junctions, parking, speed, observations, hazard clips score.
FAQ, next steps, and troubleshooting
Can I legally learn entirely on my own?
Not on public roads. In the UK, you must have a supervisor (21+, full licence 3+ years), L plates, and insurance. You can practise solo on private land with the landowner’s permission if the public can’t access it.
Do I need paid lessons?
You can self-direct most of it if you have a solid supervisor. Still, one or two sessions with an ADI are worth it for roundabouts, complex junctions, and pre‑test polishing. They know the test standards inside out.
Manual or automatic?
If you want the most flexible licence, go manual. If your coordination anxiety is stalling your progress, start in an auto and build road craft first. You can always upgrade later.
How many hours does it usually take?
It varies wildly. A common range is 30-50 hours of quality practice, plus daily theory work. Short, frequent sessions build skills quicker than one long weekly drive.
Can learners go on motorways?
Yes, but only with an approved instructor in a dual‑control car. Otherwise, use dual carriageways for higher‑speed practice.
What’s the biggest mistake self‑taught learners make?
Weak observations: skipping blind spots, late mirror checks, and rushing into gaps. Say MSPSL out loud until it’s automatic. Second place: tailgating. Keep that 2‑second gap minimum (more in rain).
Do I need special insurance?
Yes, learner driver insurance covering the specific car. If using a friend’s or family member’s car, make sure their policy allows a learner with a supervisor.
How do I practise hazard perception properly?
Do 5-10 clips daily. Aim to spot developing hazards early and maintain a rhythm of reasonable clicks as the risk builds. Review missed cues. The DVSA’s official materials match the test style best.
What about winter driving?
Drive smoother, leave huge gaps, and avoid harsh inputs. If it’s icy and you’re new, postpone. Safety first.
Test day nerves?
Normal. Do a familiar warm‑up route, breathe out longer than you breathe in, and drive your plan. If you make a small error, park it mentally and move on.
Troubleshooting common problems
- Stalling often (manual): Hold the bite longer; add 200-300 extra revs at the start; release clutch slower; practise in a car park until it fades.
- Jerky braking: Look further ahead; brake earlier and lighter; ease off slightly just before stopping to settle the nose.
- Drifting in the lane: Eyes up and far; check centre of your lane with reference points on the bonnet; relax your grip.
- Roundabout panic: Slow early, read signs, pick your lane, commit only on a safe gap; if in doubt, go around again.
- Overthinking mirrors: Build a habit: glance centre mirror every 5-10 seconds, then check the side mirror before any change.
- Supervisor stress: Agree a script: “Direction, distance, landmark.” If tensions rise, break for five minutes.
Next steps if you’re stuck
- Nerves holding you back: Practise in very short bursts. Add one new element per session. Night drives can be calmer if the roads are quiet.
- No safe place to practise: Find a business park on Sundays or a college car park off‑hours with permission.
- Plateaued skills: Book a single ADI session focused on your one weak area (e.g., big roundabouts). Record takeaways and repeat the route later.
- Test backlogs: Be flexible with time and location. Keep sharp with weekly mocks and hazard clips.
- Switching from auto to manual later: Do a clutch‑only week in a car park to master bite and balance before heading back onto roads.
Final thought: you’re not cutting corners-you’re running a tight, structured plan. Keep it legal, practise little and often, and treat every drive as training. That’s how you go from new learner to safe, confident driver who actually enjoys the road.